
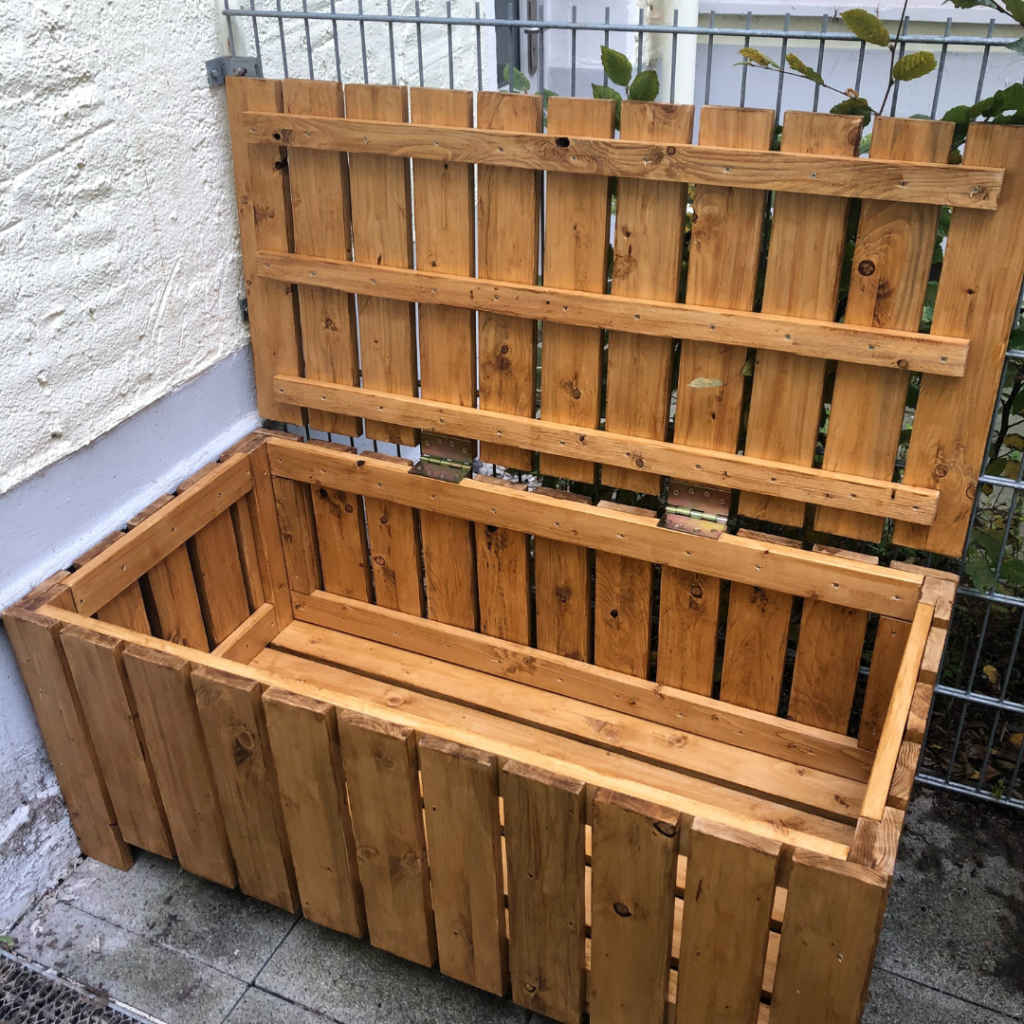
I don’t like to wait to start things. When I get excited about an idea – which is always, since I’m a scanner – I want to get going on it RIGHT NOW. That’s actually why my blog is called Go Before Green: I want to get going before all the lights turn green. So when I found myself wishing I could build a storage bench for our back patio, I wanted to start. After all, why can’t I do woodworking in an apartment?
Turns out, it’s possible to build functional furniture without a workshop, garage, or some other dedicated space. I’ll talk you through the must-haves, the benefits that I have, and some of the lessons I want to apply to my next project.
Must-Haves For Woodworking in an Apartment
While you don’t necessarily need to have a garage or workshop, there are some things that you can’t do without.
Space
Like any hobby, you need a work space. This doesn’t have to be a dedicated place in your home – I mostly used the dining room table for assembly – but you do need a clear, level area that’s at least as large as the largest piece of your project.
Ventilation
Maybe I should have put this one first. This is the most important thing to have for your own safety and becomes doubly important if you’re woodworking in a small apartment. Especially if you’re using stains or paints with fumes, you need to be working somewhere with ventilation. We have European two-way windows in our dining room, so I popped those open anytime I was staining.
Clean-up
Fun fact: wood (especially oak and ash) particles, if inhaled, cause cancer! So it’s imperative that you have a plan to clean up your dust. Even if you have the window open while you’re working, those particles will settle in your home and could get kicked up and inhaled later. Having a good vacuum available is a must.
Personal Protective Equipment
Ears, eyes, and mouth, team. Earplugs, safety glasses, and the proper mask are the uniform for working with wood. They’re annoying, but necessary. And if you’re having trouble finding the right masks because of COVID (I had to check a couple hardware stores), it’s worth it to wait.
Tools?
This is a question mark because I don’t think there are many must-have tools. For every step in your project, there are a variety of options – you can sand and saw by hand, or with machine. Some steps you could even completely outsource! Most hardware stores will cut wood to length for little to no cost. I personally have a drill, chop saw, and power sander – because I have certain advantages to my living situation!
Benefits I Have
Previous Experience
I posted most of my process on Instagram, and one of my friends asked how I know how to do all of this. The answer is 50% “I took a class,” and 50% “I don’t.”
In early 2018, I took a woodworking class at the Pratt Fine Arts Center in Seattle. I chose to do this class because I had been thinking through how to take the first few steps toward my life goal of building a grandfather clock (more here about taking small steps to your goals).
A really kind man named Pete guided a half dozen of us through building a tool caddy. From that class, I got a primer on using power tools safely, which was enough to give me the confidence to tackle this project.
So when I decided I wanted a storage bench, I hunted down these plans on the internet, and felt reasonably sure I could figure it out without losing a finger or wasting too much money.
Outdoor space is both an inspiration and enabler of woodworking in an apartment.
Outdoor Space
While I don’t have a garage or a shop, I do have outdoor space. My apartment has a couple of fenced-in terraces attached to either side of it. They’re not large – only about 4 feet wide – but it’s enough space to operate a chop saw and sander, which was enough for me to start woodworking in an apartment.
Nearby Hardware Store
One benefit I don’t have is a car – we dropped ours when we moved to Berlin. But I DO have the benefit of excellent public transportation that can get me to a hardware store in about 20 minutes. And I MILKED that benefit for this project! I got all my boards cut to a reasonable carrying length at the hardware store, then carried them onto the subway to take them home.
Was it as easy as loading into a car? No way.
Did I have the space on my little terrace to cut 3-meter boards to length? Also no.
So I spent a couple weeks being that girl on the subway lugging boards.
Understanding Spouse
Woodworking in an apartment isn’t perfectly convenient. And my husband was incredibly understanding and patient as it took me three weeks to gather wood, sand it, cut it, stain it, and get all the pieces together. That was three weeks of our dining table being half-consumed in materials. And it involved several days of open windows for drying stain…when it was about 50 degrees out. Oops.
Tips for You (and reminders for me)
I definitely learn by doing. Whenever I try something new, I can never think of questions before I get halfway into a task. So I set off to build myself a storage bench with this plan and a reasonable certainty that I would mess things up and have to improvise to make it work.
Along the way, I learned some tips that I’m going to share, partially for your benefit and partially because I might need to remind myself later.
Do a quick measurement check before buying/sanding/staining/etc.
The plans I used had a list of the boards I would need as well as a cut list. But I’m in Germany, so everything is in millimeters and slightly differently-sized than American boards. More specifically: my boards are wider than American boards. This led to a benefit of not needing as many boards to cover the sides (which I realized AFTER I’d bought them and hauled them home…). But it also meant a couple of rounds of trial and error in getting them to fit together as planned.
All this to say: do a quick measurement check before you get going. Make sure the math at the joints works out. It will save you some heartache down the line.
Sand as you go
It took me about six trips to the hardware store to get the total amount of wood I needed. I bought the cheaper, rough boards, so they took a LOT of sanding before they were ready for sand. If I did this project again, I would be sure to sand in short daily bursts as I bought more wood. Instead, I sanded a few boards as they came in, then decided to do the rest in one day.
Hoo boy, did my back hurt.
Maybe it’ll be easier to do it all at once when/if I have a workbench. But while I’m sanding things on the ground, it will be better for me (and my neighbors) if I keep the sanding sessions short and sweet.
Stain in one big rush – and paint, if you can
On a completely opposite note, I should have planned to do one big stain day. I ended up needing to do three different coats of treatment, with a 12-hour drying time for each coat. Doing those gradually over the course of several days left my windows open in a rapidly-cooling October for far too long.
Even better, next time I’m just going to paint the damn thing. One coat, with maybe a protective layer once it’s all put together? Yeah, that sounds preeeettty good. Stain is a pain in the neck.
I’m sure, as I build more things, I’ll come up with more specific tips and tricks, but for today, that’s how I’m going to improve how I do woodworking in an apartment.


It looks wonderful Katherine! Useful and stylist.
Thanks! I need to get some containers for inside so my stuff doesn’t get wet this winter.